Summer rain here in Kerala is a good opportunity to photograph lightning, mainly the months of April and May. The photos were taken last May.
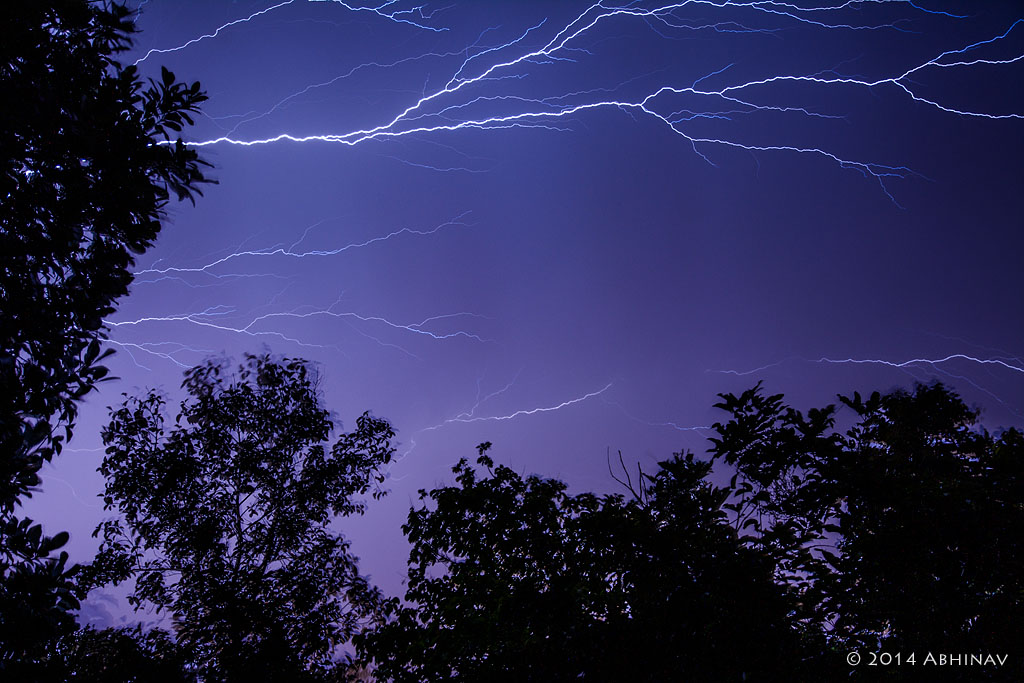
Exif: ISO 100, 58s, f/4.5, 31mm, D7100, 16-85mm f3.5-5.6
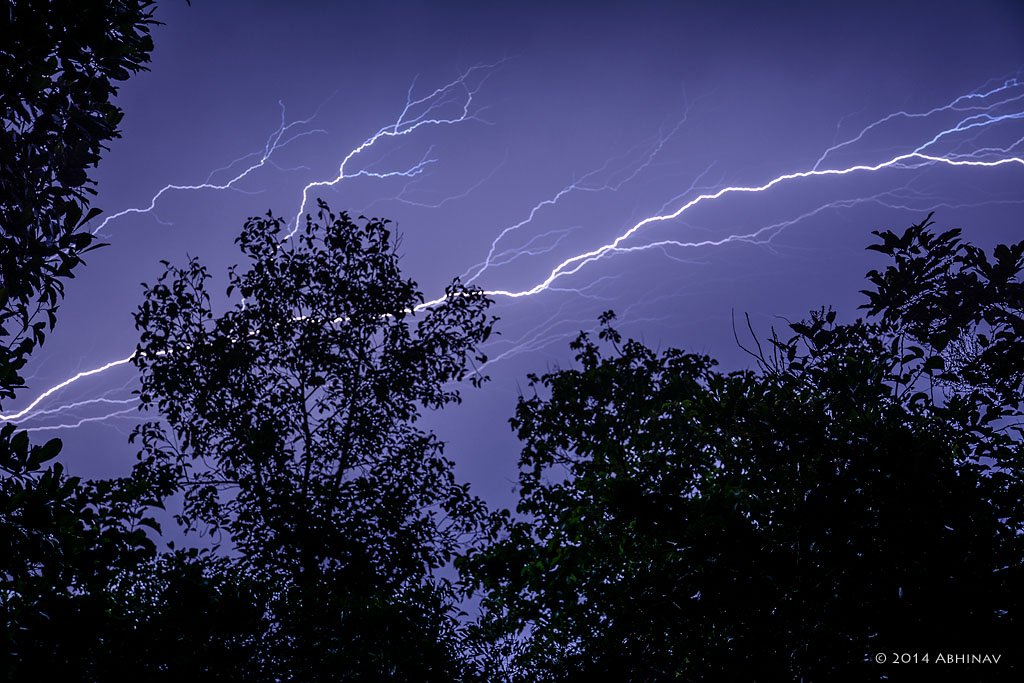
Exif: ISO 100, 3.1s, f/4.8, 38mm
Here I am sharing what I have learned from my first experiment in lightning photography with an SLR. Earlier I had tried the same with compacts, but image quality was so poor.
Lightning is a wonderful and beautiful phenomenon, if it is watched in the correct sense; otherwise it can be scary too 🙂 As you can see from the photos these lightnings were far up in the sky and hence was not dangerous like the ones which hit the Earth. By the time when this picture was taken, rain had already subsided and still there were some beautiful flashes in the sky. Warning: IMHO don’t go out to photograph it when lightning is at its peak. And some studies show that lightning is getting more severe year by year – another consequence of global warming.
Coming to the point, these were taken from the terrace of my house after Sunset. Here are the requirements.
- Any camera with a manual mode of exposure.
- A fairly wide angle lens.
- A tripod, or a way to keep the camera stable.
- A cable release if there is one. I didn’t use one.
And these are steps to get a photo like this:
- First of all, lightning is better to shoot after sunset when no other light is in the sky. Watch the sky and find the direction in which lightning is more prominent.
- Set the camera on the tripod, because shutter speed required is fairly long. If the lens has VR or IS, it off.
- Set to Manual Focus. Auto focus can’t be used since it is dark. By trial and error, focus on the clouds where lightning is going to occur.
- Choose a large aperture to gather enough light.
- Choose a low ISO for maximum quality. The above pictures were taken at ISO 100.
- Switch to Manual exposure (M) or Shutter Priority (S). Select Time mode or Bulb mode. These modes allow to get shutter speeds even beyond 30 seconds. In time mode shutter opens when shutter release button is pressed, and will remain open until it is pressed again (or it will close automatically after 30 minutes). In bulb mode, shutter remains open until shutter button is kept depressed, even for hours. So it not practical to keep the shutter button on the camera depressed for a long time. A cable release offers a way to keep the shutter open without us touching the camera.
- Now it is ready to shoot. Here I used Time Mode (which is represented by two hyphens on the screen for Nikon cameras, which comes after 30″ when rear dial is rotated). Set Timer and press the shutter release button. Now the shutter is open. Now keep it like that and watch the sky for a lightning flash. Don’t disturb the camera.
- Just after a lightning has flashed in the sky which comes inside our frame, press the shutter button again to complete the exposure.
- Inspect the photo on the rear LCD to make sure the picture is up to what was expected or visualized in mind. If not, repeat same for another flash in the sky, or try different ISO and Aperture combinations to get the best exposure.
So that was my experiment with lightning photography. There can better ways and techniques. Have you tried lightning photography? What are your techniques or ideas? Feel free to share it in the comments.
